

There are many practical uses for internet recovery. Learn how to utilize Internet Recovery to reinstall macOS on a blank or damaged storage device.
Only Macs built after 2009 offer online recovery options. To use Internet recovery, you may need to update to the most recent version of macOS if your machine was released in 2010 or 2011. Using Internet Recovery Mode is a convenient way to reinstall macOS on a refurbished Apple MacBook or a MacBook with a new solid-state drive (SSD), ensuring a smooth and reliable operating system installation.
How to Start Up a Mac in Internet Recovery Mode
Shut down the computer

Once the computer is completely shut down, press the power button, then immediately press and hold the key combination cmd + option + R

When the spinning globe animation appears, you can release the keys.

The globe will spin while Internet Recovery starts up. If you are not using a wired internet connection, a choose network prompt will appear. Use this menu to connect the computer to a WiFi network.

Once a network connection has been established, a progress bar will appear underneath the spinning globe.

This process is prone to timing out. If you receive an error, try again using a cable connection to reach the internet rather than WiFi. Depending on your model, you may need an adapter to accomplish this.
This process is prone to timing out. If you receive an error, try again using a cable connection to reach the internet rather than WiFi. Depending on your model, you may need an adapter to accomplish this.
How to use Internet Recovery to install macOS to a new SSD
Before you can install macOS to the new drive, you'll need to format the drive so the installer can recognize it.
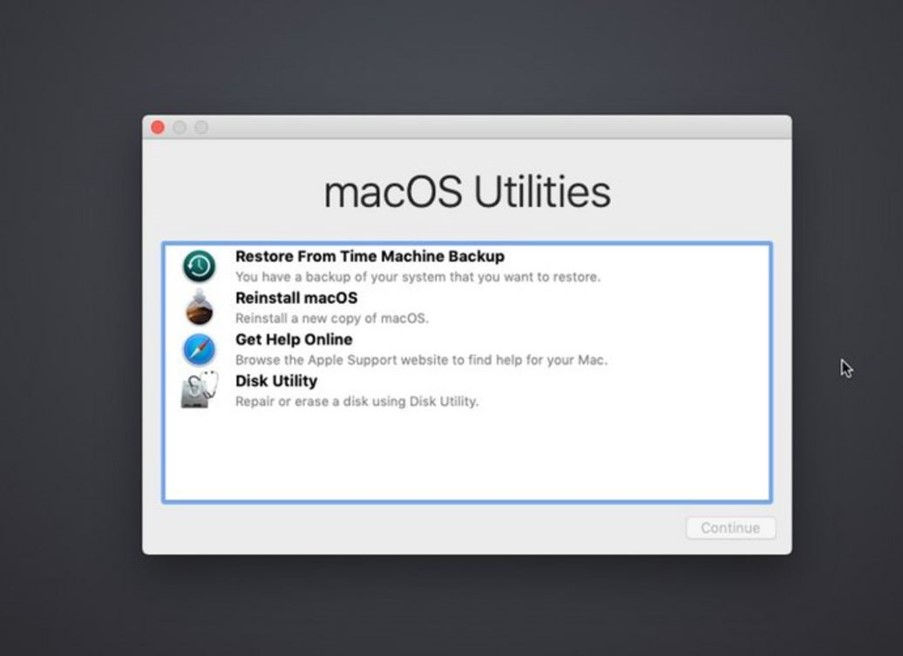
Open Disk Utility from the recovery menu, select your drive, and click the Erase button toward the top of the Disk Utility window.

Make up a name for your drive, and make sure the format is set to Mac OS Extended (Journaled) or APFS. If there is a "Scheme" option, set it to GUID Partition Map.
If you don't see your drive listed in the Disk Utility menu, select Show All Devices from the View section of the menu bar.

Once the new drive is formatted, press Command + Q to exit Disk Utility and return to the recovery menu.
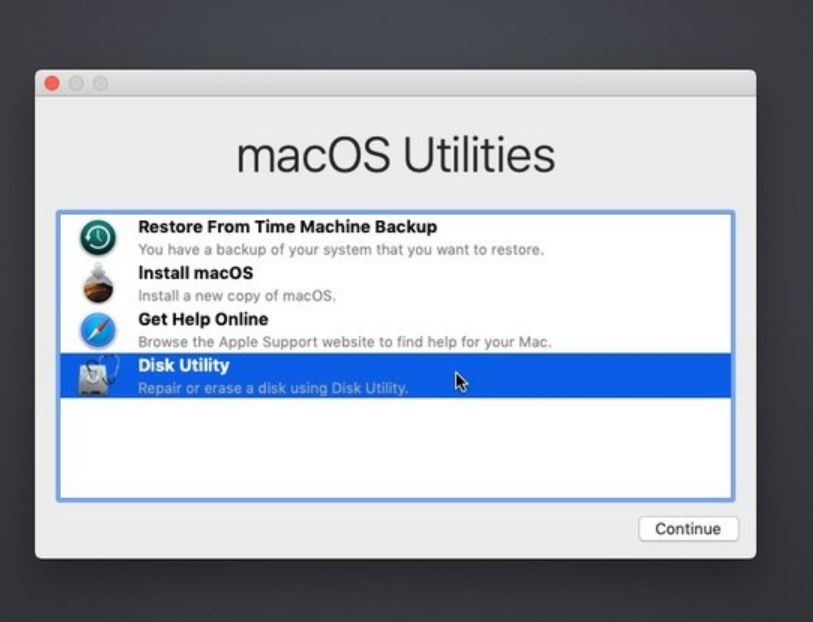
Open Disk Utility from the recovery menu, select your drive, and click the Erase button toward the top of the Disk Utility window.

Follow the prompts to install macOS, selecting the newly formatted disk as the target for the installation.


Your computer may restart several times during the installation of macOS. Once the installation is complete, you can use Migration Assistant to transfer data from your old drive to the new
Comments